Experiencing a flood, fire, or other property disaster can feel overwhelming, but knowing the immediate steps to take can make all the difference. Emergency mitigation and restoration are crucial processes that help contain damage, protect your property, and initiate the path to recovery. Mitigation focuses on minimizing further harm, while restoration brings your space back to its original condition—safely and effectively. By understanding these processes, you’ll be prepared to act swiftly and ensure your home or business receives the care it needs when every second counts.
What is Emergency Mitigation?
Emergency mitigation is the immediate response to a disaster or unexpected property damage to prevent further harm and secure the affected area. This process is all about acting fast to contain and control the situation, minimizing the risk of additional structural, water, or fire-related damage. By addressing immediate threats, mitigation protects your property and sets the foundation for effective restoration.
When is Emergency Mitigation Needed?
Emergency mitigation is essential after any event that threatens the structure or safety of your property. Situations that require emergency mitigation include:
- Flooding or Water Damage: Burst pipes, roof leaks, or natural disasters can lead to water infiltration that requires immediate containment.
- Fire and Smoke Damage: Fire not only damages property directly but also leaves behind smoke and soot that can further deteriorate surfaces and air quality.
- Mold Infestation: If mold begins spreading due to excess moisture, rapid action is needed to stop growth and protect indoor air quality.
- Storm or Natural Disaster Damage: High winds, hail, and severe weather can compromise your property’s exterior, leading to water infiltration or structural hazards.
The quicker mitigation starts, the less likely secondary damage will occur, which reduces overall repair costs and the time needed for full restoration.
How Does Emergency Mitigation Differ From Emergency Restoration?
While emergency mitigation and restoration are closely related, they serve different purposes in the recovery process:
Emergency Mitigation focuses on immediate actions to stop further damage. This includes drying water, securing broken windows, and removing hazardous materials to stabilize the environment.
Emergency Restoration, on the other hand, involves repairing and rebuilding your property after mitigation is complete. Restoration brings your space back to its pre-damage condition, whether it’s replacing damaged drywall, repainting surfaces, or restoring flooring.
In short, mitigation is the critical first step to contain damage, while restoration is the final step to make your home or business look and feel like new again.
The Steps of Emergency Mitigation
Emergency mitigation is all about acting quickly to stabilize your property and prevent further damage. Here’s a deeper look at the steps taken for each type of disaster to secure and prepare your space for restoration.
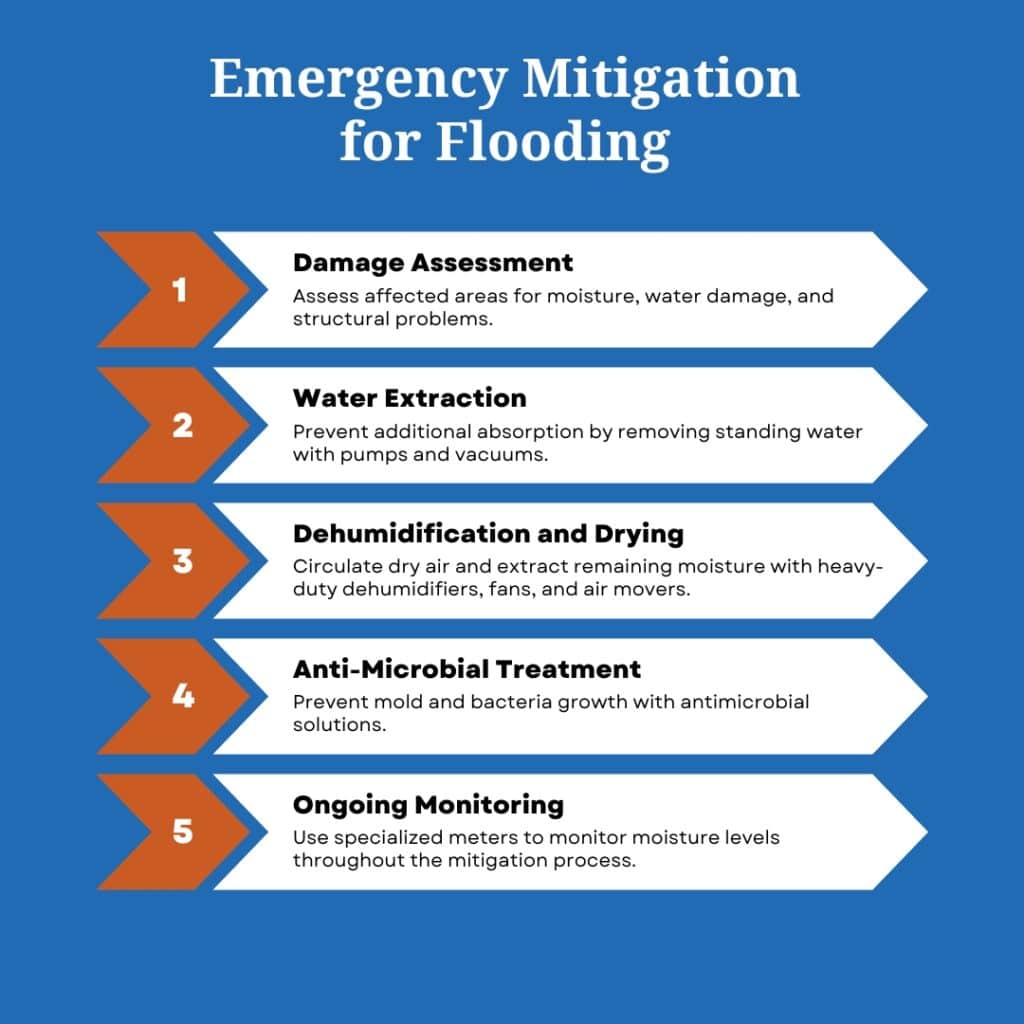
Emergency Mitigation for Flooding or Water Damage
1. Initial Damage Assessment
Professionals begin the water mitigation process by assessing all affected areas, checking for visible water, moisture in walls and floors, and any areas at risk of structural damage. Advanced moisture detection equipment helps identify hidden water behind walls or under flooring, providing a full picture of the extent of the damage.
2. Water Extraction
Once assessed, the team uses industrial pumps and vacuums to remove standing water as quickly as possible. This process prevents further water absorption into structural elements, reduces the risk of electrical hazards, and helps avoid irreversible damage to floors, walls, and furniture.
3. Dehumidification and Drying
After visible water is removed, heavy-duty dehumidifiers, fans, and air movers are strategically placed to circulate dry air and extract remaining moisture. This step is crucial in preventing mold growth, wood warping, and structural weakening caused by prolonged dampness.
4. Anti-Microbial Treatment
To further prevent mold and bacteria, the affected areas are treated with antimicrobial solutions. This helps eliminate any microscopic contaminants that might pose a health risk or lead to future mold infestations.
5. Ongoing Monitoring
Throughout the drying process, moisture levels are regularly monitored using specialized meters to ensure complete dryness. This careful oversight is essential to avoid any residual moisture that could compromise structural integrity or promote mold growth once restoration begins.
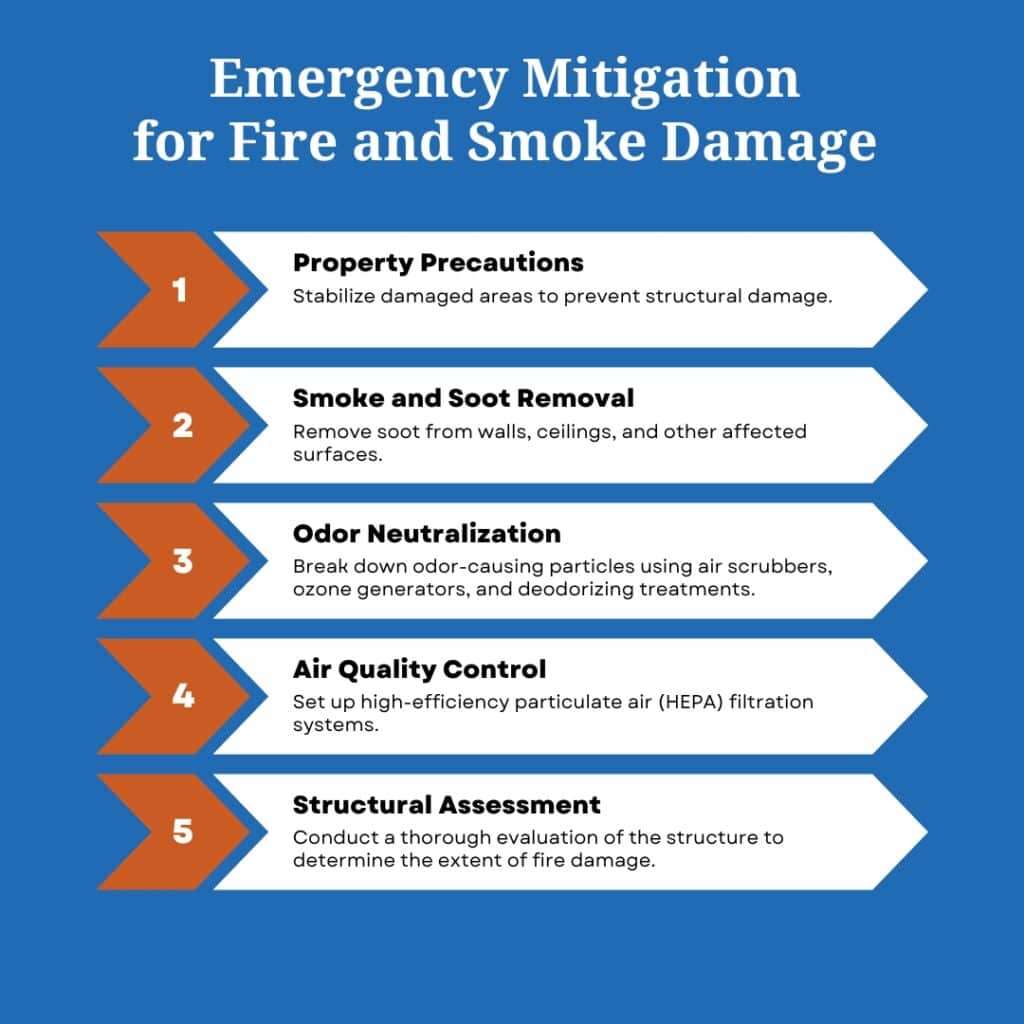
Emergency Mitigation for Fire and Smoke Damage
1. Securing the Property
After a fire, damaged areas are stabilized to prevent further structural compromise. This may include boarding up broken windows, tarping damaged roofs, and securing weakened walls to protect the property from additional exposure to weather or vandalism.
2. Smoke and Soot Removal
Smoke and soot residues are acidic and can corrode surfaces if left untreated. Restoration teams use specialized tools and cleaning agents to safely remove soot from walls, ceilings, and other affected surfaces. Immediate removal reduces the likelihood of staining and long-term damage.
3. Odor Neutralization
Smoke odor can linger long after the fire is extinguished, permeating upholstery, carpets, and air ducts. Air scrubbers, ozone generators, and deodorizing treatments are used to break down odor-causing particles, leaving the indoor air fresh and clean.
4. Air Quality Control
The presence of smoke, soot, and other particulates can compromise indoor air quality, which poses health risks. High-efficiency particulate air (HEPA) filtration systems are set up to filter airborne contaminants, creating a safer breathing environment for occupants and restoration workers.
5. Structural Assessment
Once the area is stabilized and smoke has been cleared, the team conducts a thorough evaluation of the structure to determine the extent of fire damage. This assessment identifies any compromised materials or areas that need replacement, ensuring the building is safe for the restoration phase.
Mold Infestation
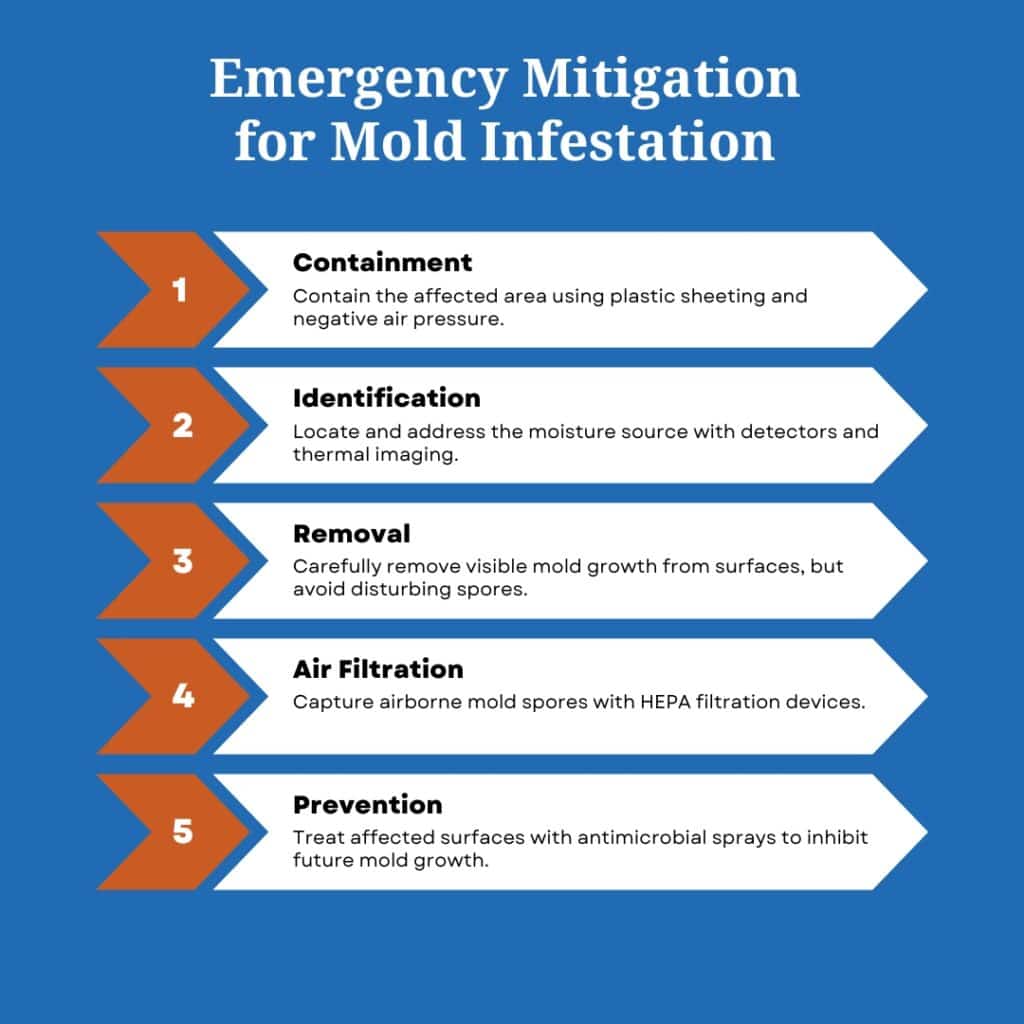
1. Containment of Affected Areas
Mold spores spread easily, so the first step is to contain the affected area using plastic sheeting and negative air pressure. This prevents spores from traveling to unaffected areas and reduces the chance of a larger infestation.
2. Moisture Source Identification
Mold thrives in damp environments, so identifying and stopping the moisture source—whether it’s a hidden leak, condensation, or poor ventilation—is critical. Restoration professionals use moisture detectors and thermal imaging to locate and address these sources, ensuring the mold does not return.
3. Mold Removal
Using specialized equipment and protective gear, professionals carefully remove visible mold growth from surfaces, taking care to avoid disturbing spores. For porous materials like drywall or carpeting, affected sections may need to be cut out and safely discarded.
4. Air Filtration
HEPA filtration devices capture airborne mold spores, preventing them from settling on clean surfaces and stopping the spread of the infestation. This step is crucial to ensure a thorough and lasting mold remediation.
5. Preventative Measures
After removal, affected surfaces are treated with antimicrobial sprays to inhibit future mold growth. Restoration teams may also recommend humidity control measures or ventilation improvements to keep the area dry and mold-free in the long term.
Storm or Natural Disaster Damage
1. Safety Assessment and Securing Hazards
Severe storms can leave behind a variety of hazards, from downed power lines to debris and unstable structures. Professionals perform a safety assessment, securing areas that could pose immediate risks, and flagging any dangerous spots to prevent accidents.
2. Boarding Up and Tarping
To prevent further damage from the elements, restoration teams board up windows, doors, and any other open points in the property’s structure. Roofs may be tarped as a temporary measure to keep out rain and debris until permanent repairs are possible.
3. Water Removal (if necessary)
If the storm has caused flooding, the water extraction process begins to remove standing water. Dehumidifiers and fans are also set up to dry out affected areas and prevent additional water damage.
4. Debris Removal
Storms often leave a mess of debris—branches, glass, and other objects that can be hazardous or obstruct access. Crews remove large debris from the property, clearing the way for safe entry and further mitigation steps.
5. Structural Evaluation
Finally, a structural evaluation is conducted to identify any critical repairs. This includes checking for compromised walls, damaged roofing, and other areas that need reinforcement. This assessment ensures the building is stable and ready for a thorough restoration process.
When Disasters Happen, We’re Here to Help
When disaster strikes, every second counts. Taking swift action through professional emergency mitigation can make all the difference in protecting your property and minimizing damage. At Valley Restoration, our experienced team is ready to respond 24/7, providing the expertise and care needed to secure your home or business and prepare it for a full recovery. Don’t wait—contact Valley Restoration today to ensure your property is in safe hands and on the path to restoration.
Frequently Asked Questions About Emergency Mitigation
1. What is the difference between emergency mitigation and restoration?
Mitigation is the immediate response aimed at preventing further damage, such as extracting water, boarding up windows, or securing damaged structures. Restoration, on the other hand, involves the repairs and rebuilding needed to return the property to its pre-damage condition.
2. How quickly should I start emergency mitigation after a disaster?
Ideally, mitigation should begin as soon as possible, usually within 24-48 hours, to minimize damage, prevent mold growth, and increase the chances of salvaging materials and belongings.
3. Will my insurance cover the cost of emergency mitigation?
Most homeowners’ insurance policies cover emergency mitigation if the damage is caused by a covered event (like a storm, fire, or burst pipe). However, it’s best to check your policy and contact your provider to confirm coverage.
4. How long does the emergency mitigation process take?
The timeline varies based on the extent of the damage and the type of disaster. Basic mitigation can take a few hours to a few days, but larger incidents, like widespread flooding or fire damage, may require several days or weeks for thorough mitigation.
5. Can I handle mitigation on my own, or should I call a professional?
While some minor steps (like turning off the water supply or ventilating an area) can be handled by homeowners, professional mitigation is recommended for most situations. Restoration experts have the tools, knowledge, and experience to identify hidden damage and perform effective mitigation safely.
6. What should I do immediately after water or fire damage?
If it’s safe to do so, turn off the main water supply in the case of water damage or turn off utilities if a fire has occurred. Avoid entering areas that may be hazardous, and call a professional mitigation service as soon as possible.
7. How can I prevent mold growth after water damage?
Mitigation teams use dehumidifiers, air movers, and anti-microbial treatments to dry the area and prevent mold. Acting quickly and thoroughly drying out affected areas are crucial in stopping mold growth.
8. Do I need to vacate my property during mitigation?
This depends on the extent of the damage. For extensive water or fire damage that affects air quality, structural integrity, or poses health hazards, temporary relocation might be necessary. Your mitigation team can provide guidance based on the severity of the damage.
9. Can all items be salvaged after water, fire, or mold damage?
Not all items can be saved, especially if they have absorbed a lot of water, soot, or mold. However, restoration professionals have specialized tools and techniques to salvage belongings whenever possible, especially those with sentimental or high value.
10. How can I prepare my home to minimize the need for emergency mitigation in the future?
Preventative measures, such as regular plumbing inspections, fire alarms, proper drainage, and securing loose roofing or windows, can reduce the risk of severe damage. Simple steps like keeping gutters clean and addressing leaks quickly also go a long way.
11. When should I call my insurance company after a disaster?
It’s best to contact your insurance company as soon as possible after a disaster. Prompt reporting helps expedite the claims process, allowing an adjuster to assess the damage quickly. Most insurers have 24/7 hotlines for emergency claims, so you can begin the process immediately.
12. Can I begin cleaning up my property before it is inspected?
It’s generally recommended to avoid extensive cleaning before an inspection, as the insurance adjuster needs to see the damage as it occurred to accurately assess your claim. However, you can take basic steps to prevent further damage, such as turning off the water supply, removing excess water if possible, or securing unsafe areas. Be sure to document everything thoroughly with photos and videos before doing any cleanup to support your claim.
